Greetings,
This is without a doubt a "newbie" question, but, well, I am a newbie. Heh. I've read through the tutorials on the Anime Studio website, and watched some of the guides, and I've read through the FAQs here on this forum. But I still can't figure this out...
The problem I'm having is this...
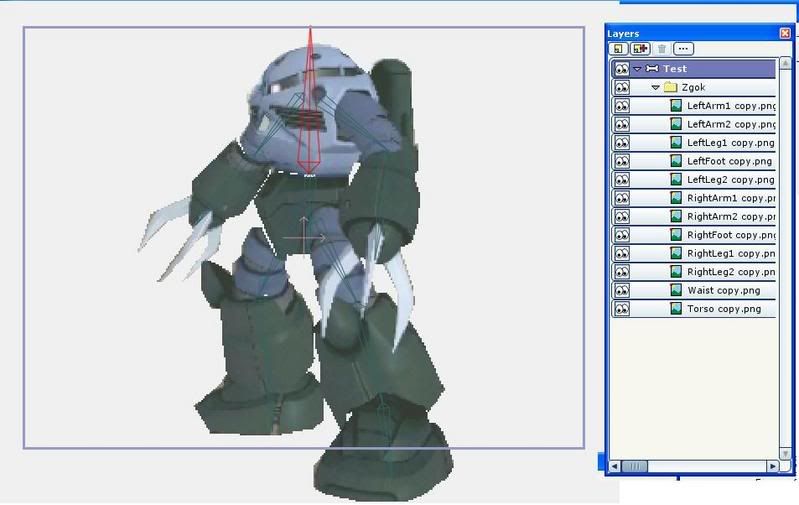
I've imported a number of images from Photoshop which I've used to build a body. There's a head, torso, waist, left bicep, right bicep, and all the rest. I than put them all into a group. Lastly I created a Bone layer and dropped the group of images onto the Bone layer.
Than I tried to set up the skeleton by connecting the Bones (arm, head, waist, ect.). Than to see if it was working, I attempted to manipulate the Bones. However, while the selected Bone moved just fine, the image would not move with it. The left arm Bone, for example, would move but the left arm image would not.
I assume I missed a step somewhere, or didn't do something right. But I'm not sure where. Because I have a number of images in a group, perhaps I need to tell each Bone which image they're "connected" to or "bound" to-- which is briefly gone over in the tutorial. In the tutorial it shows an image outlined in a number of tiny boxes, as you can see in tutorial 3.1 "Bone Binding", but it doesn't seem to say how you can get those box outlines around an imported image that you created.
So that's what I'm trying to figure out-- why I can't get the image to work, and how I can get it working. In case it helps, here's a screen shot of what I've done. Any help would be very much appreciated.
Thank you for your time.
(And for the record, I'm using Anime Studio Pro 5.)
Bones "Binding" to an Image...?
Moderators: Víctor Paredes, Belgarath, slowtiger
-
ZeonZumDeikun
- Posts: 2
- Joined: Wed Dec 12, 2007 9:22 am

Exactly.perhaps I need to tell each Bone which image they're "connected" to or "bound" to
You made one mistake in your setup. Any layer can only be bound to a bone in the bone layer directly on top of it in a hierachy. If you put layers into a group layer and the group layer into the bone layer, all you can bind to these bones is the group layer.
-1. Put the images out of that group and directly into the bone layer.
1. Select an image layer you want to bind.
2. Select the "Bind Layer" tool (the bone on top of that sheet)
3. With this, select the bone you want to bind that image to. It should get red.
4. Press the space bar to let AS know what you've done.
Continue with other images.
-
Víctor Paredes

- Site Admin
- Posts: 5868
- Joined: Tue Jan 25, 2005 3:18 pm
- Location: Barcelona/Chile
- Contact:

-
Víctor Paredes
- Site Admin
- Posts: 5868
- Joined: Tue Jan 25, 2005 3:18 pm
- Location: Barcelona/Chile
- Contact:
but sometimes it's not necessary to bind layers.slowtiger wrote:1. Select an image layer you want to bind.
2. Select the "Bind Layer" tool (the bone on top of that sheet)
3. With this, select the bone you want to bind that image to. It should get red.
4. Press the space bar to let AS know what you've done.
Continue with other images.
you can just put the images inside the bone layer, in frame 0 move each image layer far from the others and add bones.
then, using offset bones tool
 , move the bones to its real position.
this way, one image can be bend by several bones (for example, you have an arm image and create two bones, so now you have an elbow movement)

One more small tip. Place small vector layers of the same color behind the joints. That way you don't have the background showing through. Use the custom image swatch for the picking of the color by saving an image of what you are working on. I use a oval or rectangle and add just a few more points.
Dale
Dale
-
ZeonZumDeikun
- Posts: 2
- Joined: Wed Dec 12, 2007 9:22 am