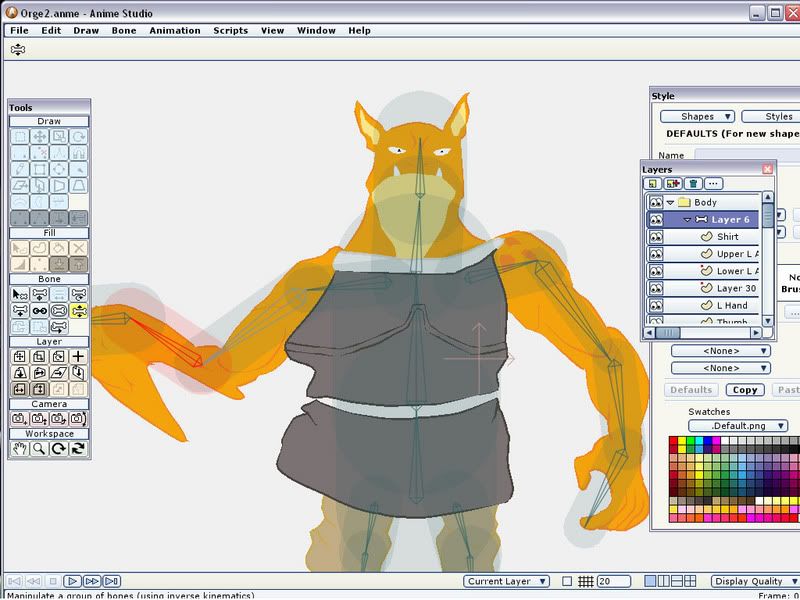
I'm having problem with stretchyness on my Orge character, pic here:
The left arm is ok,but the right arm is strectchy and also stretching the clothing.... I tried using the bone strenght,no effect,does anyone know how to fix this problem?Thanks.
2 ways. Either make a separate bone layer for the arms, or move the arms out away from the body before you place your bones, and use the offset bone tool on frame 0 to move them where they should be.
Even bone offset won't always help entirely if the closest bone to that part of the body is still the wrong bone to control it. Even moving the arm bones away you may still get some unwanted influence.
I like to use bone offset with the arms AND extra bones for the hips. Just one or two bones as children of the center body bone that cover those wide hip areas.
This is also useful later as you can use those bones to distort clothing around those spots.
This will avoid the need for one bone with a HUGE influence on the body. If you increase the bone strength to cover those wide areas you have to increase the strength on the other body bones. By using a few more at the hips they bone strength doesn't have to be so large.
Putting some constraints on the extra hip bones can do a lot for smoothing motion as well.
Another tip for bone offset. Before moving the bones out of position, save a rendered image of the completed character. After moving the bones and "messing up" your character you load that render in as an image layer and use it to put the pieces back together with bone offset.
Could you illustrate how you mean, in placing the extra bones in the hips (and I assume in the torso too)? I've experimented with a few ways, but haven't yet found an optimal solution.
Ha ha...if you call that an extreme case, you don't want to see the bones in Misty's skirt we were talking about before! I had a chain of bones going down each of the skirt's pleats! That worked great. It was the upper torso of some of the male characters I've been doing, who wear t-shirts and polo shirts, like the ones in my contest entry, that I haven't been satisfied with.
There is a chain of bones through the spine with a LARGE strength value. The character is big and fat.
To the left are "control bones". The spine bones are constrained to those bones so I don't have to touch them. I just move the two spine control bones to bend him.
At the bottom of the character are a few extra bones controlling his fat arse and stomach. They are children of the different spine bones so each rotates a bit differently smoothing out the bend.
That's a good setup. I've had chains of small bones in my spines, but I didn't have a simplified control skeleton to control them with constraints. And those bones for the arse and stomach were just the sort of thing I was wondering about. Good show!
Also those bones on his stomach and butt can be adjusted as needed. Sometimes the "bunch up" and cause a bulge. I just rotate them slightly to fix that.
I keep moving the spine controls because they get in the way.
I tried larger bones but then they are LONGER and their influence is different. I ended up with small bones to pinpoint their control over the mesh.
It was all trial and error and visual feedback using onion skinning. I believe I had big bones to start with. The smaller bones are almost like "spherical" influence. Short and stubby with a big envelope. The overlap is the key to the smooth bending.
This is a "specialized" rig for wide, short, fat characters. All that flab... bones only reach so far.
Dang!! I'm still having the same problem... Been trying to figure out this problem for weeks!!! I will be working on a project soon for my multimedia class,next quarter which is comming up soon!! If I don't fix this problem my project is doomed:( Maybe if I send the character file,maybe someone can slove the problem and see what I'm doing wrong......just PM your e-mail if anyone interested.
Thanks.....
This is a long shot but bear with me. I've had this type of thing happen to me before.
On the layer with the "funky" troublesome points. Select all the points, under the bones menu select "release points", then select "flexi-bind points".
Now see if those points are still causing trouble by rotating a bone on a frame other than 0.
Sometimes points can get messed up internally.. somehow. One time they got so messed up the only way to fix it was to just delete the points add them back in. Don't use the tool with the "X" to delete them, just select and hit delete. Hopefully you shouldn't mess up your fill shapes this way.
Another thing to check... look for teeny tiny itsy bitsy microscopic bones that were created by "accident"... I have done this a bunch of times using the add bone tool. If you just click the add bone tool and don't drag it, it creates a bone with a length of ".0001"... so tiny you can't see it but it effects the mesh. The best way to see them is to click on the bone strength tool and look for those "envelopes" around bones that "aren't there".
Then... uh... try to delete them. I have a custom made bone selection tool that I can drag over areas and select multiple bones... not sure if this can be done with the standard "out of the box" AS tools.